Cameras
330mm soft-focus lens
Simple meniscus lenses
Meniscus lenses have a convex and a concave face (usually spherical surfaces, though one face may be planar). Where the outward curve is more pronounced than the inner curve (the center is thicker than the edges), the lens is a positive focal length and will bring an image to focus by itself.
In modern photographic use, the most common use of meniscus lenses is as simple close-up attachments to camera lenses. These are usually screw-in filter-like mountings, with their power expressed in diopters. To get the focal length, divide 1 meter (1,000mm) by the diopter. So a +3 diopter lens has a focal length of 333mm.
Aberrations
No lens is perfect - there are various forms of aberration where the real-world optical performance is less than ideal. In the case of a simple meniscus lens, chromatic spherical aberations and coma are probably dominant. Spherical aberration comes from different wavelengths of light being brought to focus at different distances from the lens. Convex-concave lenses are less prone to this than convex-convex ones, but it is still significant. Coma manifests as a tendency to streak the further from the lens axis the image is viewed. Hence the term which derives from the comet tail-like effect. Filtering the light to a single colour reduces the effect of chromatic aberration, but reduces the light transmission by at least a stop. Plus focusing has to be done with the filter in place. A light yellow will suppress blue light, and be a decent compromise when working in monochrome. A medium green will suppress a lot of blue and red, at the expense of 2-3 stops of light.
Something a long the lines of a Wollaston meniscus with an offset stop is what we are aiming for here. My initial version used a lens mounted in front of a shutter. The original description of setting this up is now at the end of this document. A version with a rear mounted lens is now my preferred arrangement.
Why use a simple lens?
A +3 (330mm) diopter meniscus lens, is about the standard focal length for an 8x10 camera, and a lot cheaper than a regular large format lens for experimentation. The aberrations can be used for effect, and controlled to some extent by using smaller apertures or filtering the light towards one colour. But the aberrations and softness are a feature of the lens and need to be utilised in the creative process.
The drawback to using a simple lens in this way is that it needs some form of shutter, and without an aperture is too fast for a lens cap manual ‘shutter’.
Mounting the lens behind the shutter
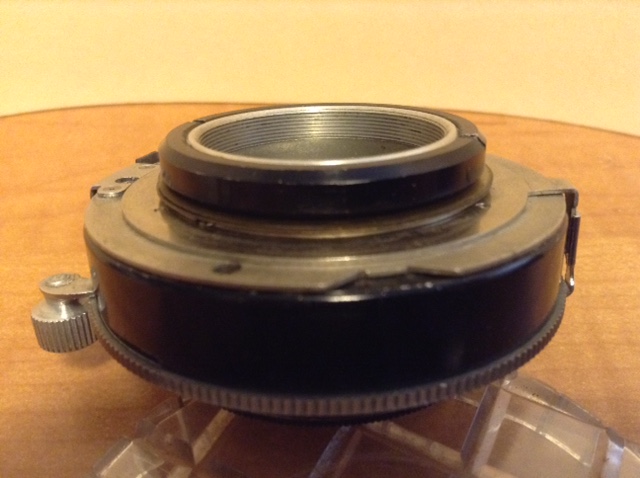
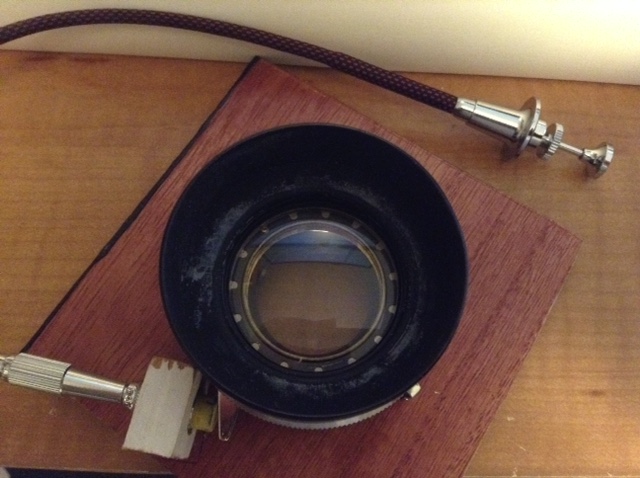
I happened to have the barrel of a 135mm Symmar lying around from a no longer functional lens. This barrel has a 49mm filter thread on one end, and the other end is threaded for a Copal #0 shutter. The spacing behind the shutter is a little longer than ideal, but it does put the lens the right way around and behind the aperture.
The Copal #0 shutter has an iris diameter of 24mm, a body thickness of 20mm, and the rear thread is M29.5-0.5. So this is a tube 20mm long, 29.5mm in diameter, and constricted by the aperture to 24mm maximum.
The effective speed of the combination is limited by the throat of the shutter, and will vary according to the diopter of the lens used. It is possible to stack lenses, though this is going to increase the aberrations, probably more than a single diopter of the same strength. It will also add extra lens surfaces and contribute to more flare. But experimentation is easy if you have the time.
Stacking diopters
The strongest diopter I have seen readily available is +10 (100mm). Stacking a +10 with a +4 on top gives a +14 (71mm). This gave me an image circle of a little over 75mm diameter when mounted on the Copal #0 shutter. Calculating this out gave a theoretical image circle of 106mm (ignoring vignetting and fall-off). So the shutter is definitely a limiting factor. So no, this is not a wideangle substitute!
In practice, a +3 (330mm) is the strongest for 8x10, a +4 (250mm) for 4x5, and a +10 (100mm) for 2x3/6x9 to give decent illumination. Note that this is illumination. This is not a lens type that has good sharp coverage unless stopped down a long way.

.")

Earlier attempts
The remainder of this page documents my early attempts with what I had available.
A 330mm f11 lens in a shutter
For my first attempt I found a +3 diopter close-up lens in a 40.5mm mount. It is a bonded mount, unfortunately,
so I cannot reverse the glass. Most Wollaston lens types put the planar or concave surface towards the subject,
but doing that with this lens would lose the filter thread function.
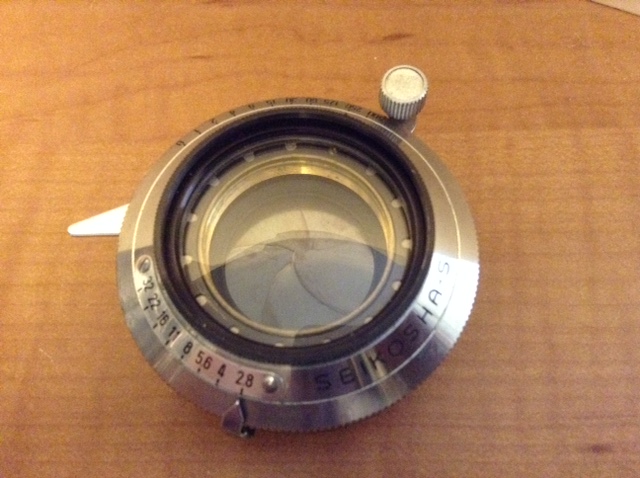
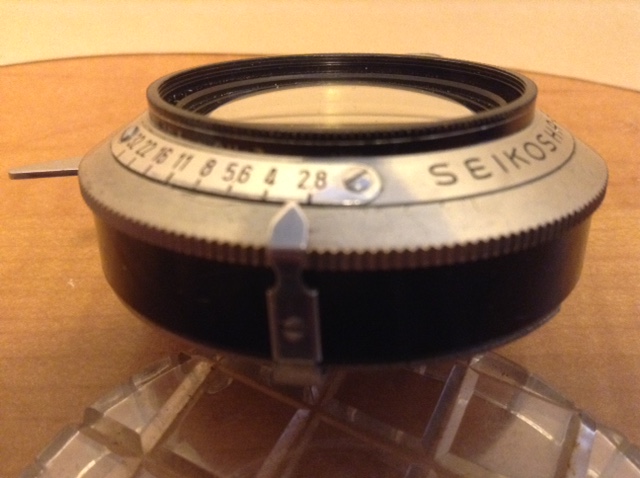
This unit just friction fits inside the front of a Seikosha-S shutter unit taken from an old Mamiya TLR lens set.
This particular shutter is not particularly usable, or it would not have been available - it does B, 1/10 sec,
and 1/60 sec - but it does have an aperture.
Since this unit was intended for an 80mm lens, the aperture values have to be multiplied by 4 to approximate
the effect on a 333mm lens (f8 indicated is f32 actual).
This is a very rough calculation - the shutter/aperture is over 5mm behind the lens itself so it is not in
the optimum location - but close enough for testing.
The physical diameter of the Seikosha-S shutter aperture is going to limit the effective maximum aperture.
So the widest true aperture is likely closer to f14 than f10.5-f11 (f2.8 x 4) .
The shutter mounting is equivalent to a Copal 0, so a lensboard is easy to obtain or construct. The main drawback for large format use with this shutter is that it only offers B, no T or shutter open lever, and the shutter release lever does not suit a cable release.
Converting the release lever to something that will accept a lockable cable release is possible. It requires the lever to have a pushable surface, and a socket for the cable release. A Leica/Nikon cable release adapter can provide the socket.
Digging around in my collection of bits turned up a 40.5mm Hoya wideangle lenshood, probably from my old
Voigtlander Bessamatic
days. This is a bit wide for a standard lens, but it will allow for some movements without vignetting.
The lens surface is unshaded otherwise. I ought to have yellow, orange, red, and green filters somewhere.
Mounting the lens and creating a cable release point
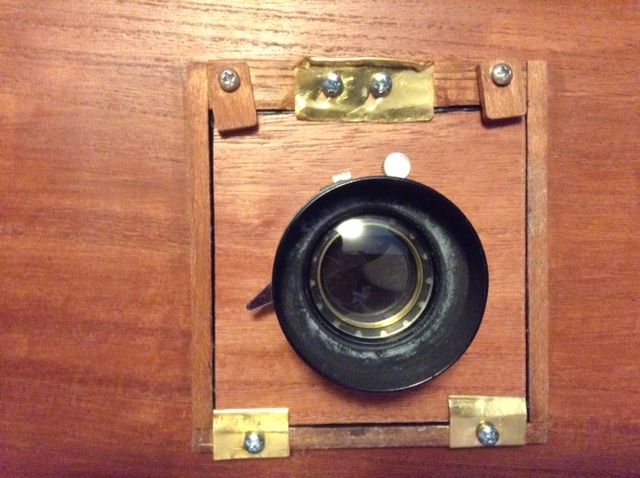
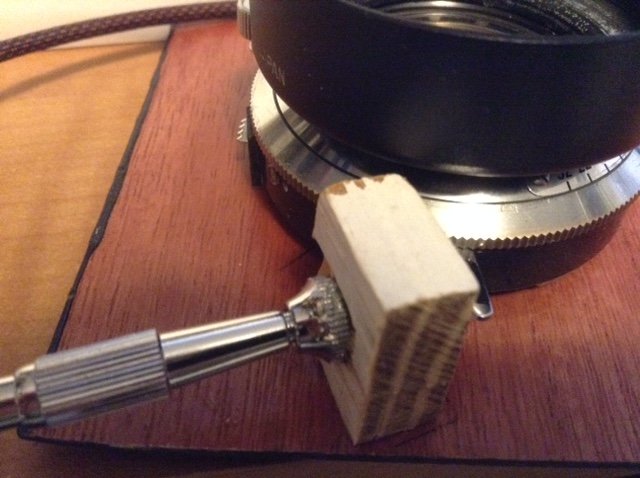
The next step was to cut a 100mm x 100mm plywood board and put in a hole for a #0 shutter. With the lens and shutter mounted on the board the spacing for setting up a cable release can be measured.
A Leica/Nikon/YashicaMat cable release adapter with a short rod (a pencil eraser) inserted makes up the core of the new cable release. This is mounted on a post from the lens board to align everything and keep the new cable release socket in position. In use, the cable release plunger pushes the rod forward, which bears on the lever, tripping the shutter. T he shutter lever has some return spring strength, so the combination returns to normal when the cable release plunger is released. The soft end of the rod keeps things aligned and prevents the rod slipping on the narrow shutter release lever. This arrangement does require that the lens mounting on the board does not rotate, but that is the usual case.
[Edit note: This was done before I had access to a 3D printer. There are many and better options now.]
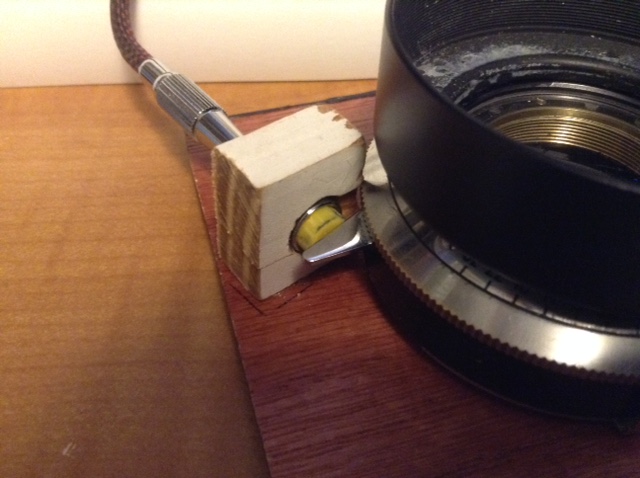
The insert for the Leica/Nikon adapter consists of a small plastic disc behind a pencil end eraser. The plastic disc protects the soft eraser material from the spike of the cable release, and the eraser material makes a good contact with the shutter arm.
The metal adapter has to be mounted on the lens board at the right height and position to be in contact with the shutter arm when at rest, and strong enough to handle the stress of pushing the shutter release arm to trip the shutter.
A screwed and glued block holding the Leica/Nikon adapter in a friction fit. It still needs some paint to resemble the board. This was done by drilling and filing a block of wood, but other materials might be better. The wood is prone to splitting when fitting the adapter. This is the second attempt!
Cable adapter in use with the shutter locked open on B. Since this shutter only offers B, all focus operations need a lockable cable release on B, and the sequence of operation requires that the shutter be reset to the chosen shutter speed each time. The diaphragm and shutter are exposed at the rear of the shutter, so the unit needs to be kept in a bag or other dust-free environment.
Materials
- Leica/Nikon/YashicaMat shutter release cable adapter
- Plastic disc - this can be cut with a standard office hole punch from any thin plastic like a margarine carton.
- Pencil end eraser - the ones held on the end of the pencil with a metal ferule are the right diameter,
- Drill to suit the release adapter (something a little larger than 8mm).
- A suitable block of wood or plastic, glue and screws.
- Copal 0 drilled lensboard.
- A spare Seikosha-S or similar shutter.
- Lens of your choice.
In use
This is not a fast lens. Wide open it is somewhere between f11 and f16, and four stops down we are in f64 territory - too dark to see much, even after allowing ones eyes to accomodate to a well fitted darkcloth.
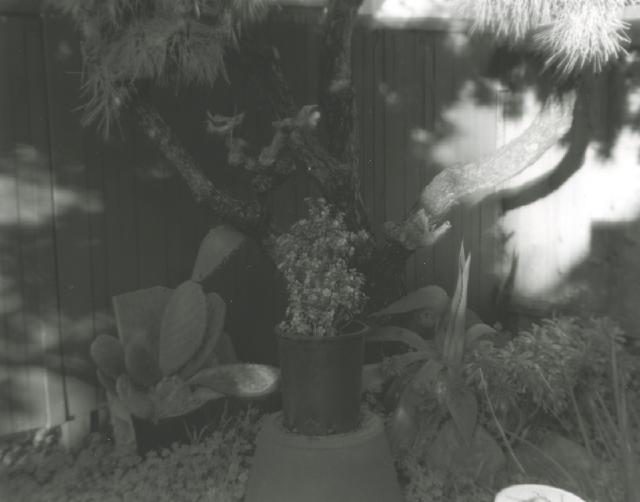
The opportunity was taken to grab a couple of images between rain storms to see how it performed. The first image is wide open, and some chromatic effect can be seen, especially adjacent to bright areas. The second image is stopped down four stops, giving much better depth of field, as expected, and taming the chromatic effect a little. These were done on the hardware 8x10 to investigate coverage (more than enough considering the softness).
Simple meniscus lens in Seikosha-S shutter, Homebuild 8x10 camera, HP5+, Thornton Two Bath 5+6 minutes, EI 200, 1/15 @f16, contact print on Ilford Warmtone fibre.
Simple meniscus lens in Seikosha-S shutter, MPP VII 5x4 camera, Atomic-X, Thornton Two Bath 5+6 minutes, EI 40, wide open, negative scan

Simple meniscus lens in Seikosha-S shutter, MPP VII 5x4 camera, Atomic-X, Thornton Two Bath 5+6 minutes, EI 40, f64, negative scan

Simple meniscus lens in Seikosha-S shutter, MPP VII 5x4 camera, Delta 100, Thornton Two Bath 5+6 minutes, EI 50, f64, negative scan

The next tests will be in more general lighting, and should include the use of a yellow or possibly an orange filter to see if the chromatic aberations are controlled.
Reconstruction to something closer to the Wollaston Landscape Lens
The Wollaston arrangement places the aperture in front of the lens, and with the concave side of the lens facing the aperture. This arrangement seems to give the best control over the aberations of a simple lens, at least once stopped down to f11 or smaller. Using the concave face towards the subject gives a flatter field at the film (though not perfect). In practice using a #0 shutter is going to put a 300mm or 333mm lens at about f16 maximum aperture from physical limits.
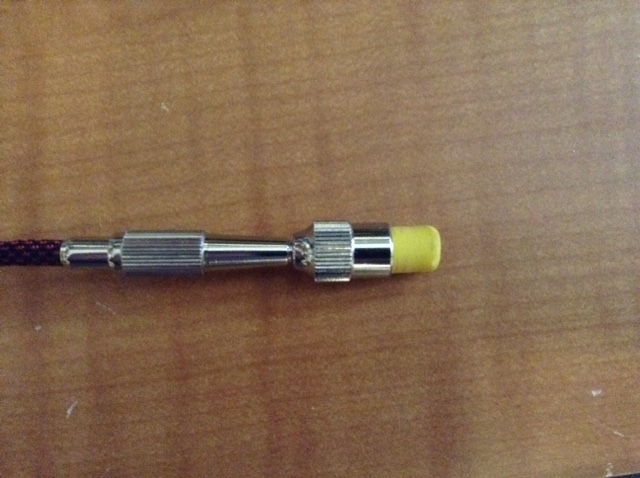
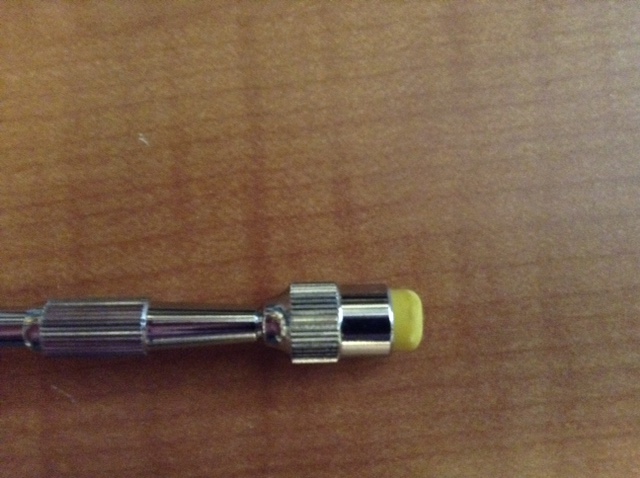
For this version, I used the same +3 diopter 40.5mm close-up lens, and used a small stepping ring to get the lens to friction mount into a barrel that came from an old 135mm Symmar-S lens (the optics of the 135mm suffered massive separation, leaving the mounts available). This mount screws directly into the rear of a Copal 0 shutter. The mounted lens retains its filter thread, so filters can be attached. Since the filters are mounted behind the lens the camera should be focused with the filter in place.
The front element mounting from the old Symmar-S, with the glass removed, makes a decent fixed hood and front filter mount. It is unlikely that extreme movements will be used with this lens, but the front mount can be easily removed if it vignettes. A spare lens cap protects the front of the shutter when it is not in use.
Since the Copal 0 shutter is designed for view cameras, it has a standard cable release mount.