3D Printing
Durst M605 Copy Arm
Recently my wife wanted to copy some of her physical artwork. Trying to do this with a tripod is always irritating - the legs are always in the wrong place. The Durst M605 enlarger had an accessory, the Siriocam, that fit over the large stud that forms the enlarger head mount, and had a camera mount on the end. This made it possible to have the camera mounted with the back parallel to the baseboard, and only one vertical support at the back. It also has the benefit of a geared vertical displacement.
The concept is fairly simple - a tube to slide over the enlarger mounting, a way to allow the Durst clamping bolt to bind the the mount, and a camera mount screw ( 1/4-20 inch ) on the end.
Design
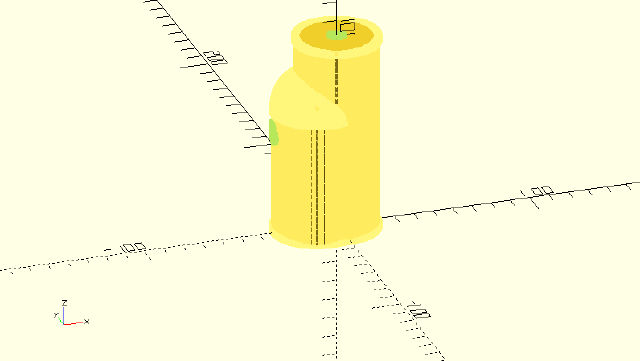
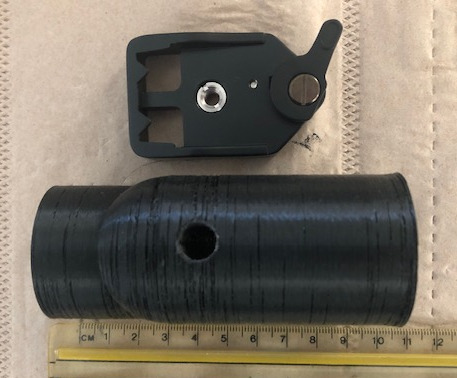
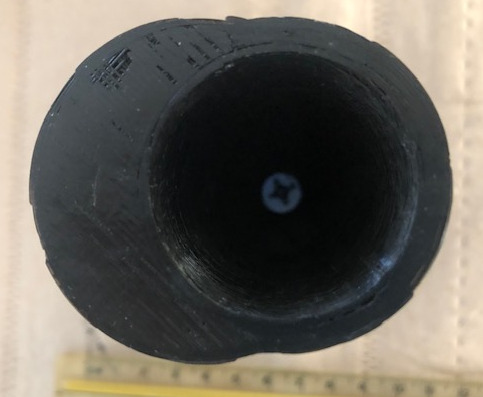
I chose to make this from a basic thick-walled cylinder with an extra bulge grafted onto the side to provide a lot more plastic for the Durst clamp bolt to self-tap. The end is a flat surface, but internally the hollow inside terminates in a dome to make printing on an FDM printer possible.
I chose to make the unit 100mm (4") long, as it makes inserting the camera screw easier, but increasing the length, if the printer can do it, is possible.


Printing
I used an enhanced strength PLA filament for this job, though PET-G or ABS would also be suitable. Black or dark grey are probably the best colours to reduce the chance of reflections from the subject, though this depends a lot on what is being copied.
Printer settings are nothing exceptional - I used 0.2mm layer height and a 0.4mm nozzle.
Assembly
You need the clamp bolt that holds the M605 head in place. This needs to be carefully screwed in to the hole in the side of the unit so that the threads cut into the plastic. This self-tapping is convenient, but it is vulnerable to cross threading if the bolt is removed often. Just use a bit of care.
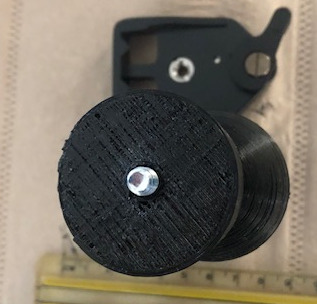
The tripod mount is a 1/4-20 bolt. I used one with a cross-head so I could use a long screwdriver to seat it from the inside. This bolt is also self-tapping, but does not need to be removed. It may be easier to cut the threads from the outside, being careful to keep the bolt perpendicular to the end of the extension. Then do the final mounting of the bolt from the inside.

A thin rubber washer on the end of the extension can help bed the camera or quick-release plate, and stop it rotating.
In Use
Mount the camera or a quick-release mount to the end of the extension, and tighten down. A screwdriver may be needed to hold the internal end of the bolt.

You remove the enlarger head by loosening the clamp bolt on the right side enough to allow the head to slide off. Then remove the bolt from the head entirely. The bolt has a cone end and is threaded for most of its length.
Start the clamp bolt into the hole in the side of the extension, then slide the unit over the enlarger mount. Tighten the clamp bolt enough to ensure the extension will not slide off, but do not tighten down yet.
At this point rotate the extension to bring the camera back parallel to the baseboard (or maybe at right-angles if you plan on copying a subject on a wall), and tighten the clamp bolt enough to stop slip.
Disassembly is the reverse of the process.
Although the enlarger control is fairly smooth, it may be useful to have a copy slide mounted on the arm to provide fine gearing to the camera height. In close-up work focusing is easier by adjusting the camera position.
Parts
-
The clamp bolt from the M605 enlarger head.
-
1/4-20 bolt with a cross-head, 25mm (1") long. If the design is changed, check the bolt length based on the actual arm dimensions. The bolt should not protrude too far, otherwise damage to the camera could occur.
-
Optional screw-mount tripod Quick Release adapter and camera place. This could remain on the arm.
References
-
Durst M605 manual - small picture of the Siriocam device and a sentence or two of description.
-
OpenSCAD source file for the Durst M605 copy arm OpenSCAD file. Since OpenSCAD runs on most computer systems, it is easy enough to adjust the dimensions and generate a new STL file. Note: The OpenSCAD program is in plain text, and will probably display in the browser. You will need to do a download to save it.
-
STL file for the original 100mm arm. Note: this is a binary file, so use a download operation to save it. if you do not want to download a binary file, use the OpenCAD source to generate your own.